Building a Service Worker with Workbox 5, TypeScript, Webpack and Angular
How to implement a service worker using Workbox, TypeScript, Webpack, and Angular

Why?
Progressive Web Apps get a lot of attention since 2017, and for a good reason. There are many benefits for end users and now that we’re in 2020, it would be a mistake to disregard those benefits.
For our upcoming product, we’re aiming to provide our end users with first-class support for offline use. Offline-first is often used to qualify sub-par offline experiences. For instance, caching whatever data you already consulted for offline use might be sufficient for some cases, but won’t allow your users to access data that they did not consult before going offline. It all depends on the application needs, but in our case this isn’t enough.
What we want is to offer users going offline a way to do 90+% of what they can do while being online. To reach this goal, we need to tackle some pretty complex problems.
In this post, I’ll concentrate on one of the first building blocks that we’ve integrated into our Angular application: a service worker. The goal here is not to present all the ideas around PWAs and service workers as there’s already a ton of content all around the place about this.
Here, I’ll explain how the service worker itself is built. I won’t be explaining how the service worker is integrated into the Angular app; I’ll leave that for a later post. If you can’t wait for that part, then do take a look at Sam Vloeberghs’s blog: https://samvloeberghs.be/posts/lessons-learned-on-offline-capabilities-with-service-workers-using-workbox-the-sequel and his repos: https://github.com/samvloeberghs/kwerri-oss/tree/master/projects/sw-lessons and https://github.com/samvloeberghs/kwerri-oss/tree/master/projects/sw-lessons-sw. Those have helped me out a lot while learning about this.
Chosen weapons
Integrating a service worker in an Angular application can be done in different ways:
- Hand-made
- Using Angular’s official support for PWAs with @angular/pwa, @angular/service-worker, NGSW and the Angular CLI support
- Using Workbox
- etc
Rolling your own solution to integrate a service worker in an Angular app is good for learning purposes, but wasteful as this is a solved problem. Just don’t do it, it’s a waste of time.
Using Angular’s support is good for most cases, but doesn’t allow for customizing the service worker implementation, which means that you’ll be stuck with whatever Angular supports through it’s declarative approach (NGSW). This point must be carefully analyzed based on your needs, because if you can accept its limitations, then NGSW is great as it doesn’t require any code. So it is both simpler and much easier to integrate.
In our case, we want to keep full control over the service worker, so we’ve decided to use Workbox, a library created by Google.
Workbox 5, bundlers and TS support
We started integrating Workbox when version 5 was almost ready for prime time (we started out with rc1). Since then, Workbox 5 final has been released and it includes support for bundling and TypeScript.
This is great news, because it means that we can write our service worker in TypeScript and benefit from type safety and all the goodness that TypeScript can bring instead of writing code blindfolded, testing manually and hoping for the best (which is always how I feel like while writing JS code).
Also, Workbox v5 has introduced support for modularity and bundling using Webpack and Rollup. This means that it is now possible to create a service worker with Workbox and have a very light bundle, including only what we actually use from Workbox.
In our case, we’ve chosen to use Webpack as it is also what’s used under the hood by the Angular CLI. Although, objectively, Rollup is probably a better choice since it is (or was??) more efficient at dead code elimination and optimization.
In case you’re already using Workbox, then check out the release notes and the migration guide to know more about what’s new/changed.
Dependencies
First of all, let’s add Workbox, Webpack and TS loader to our dependencies:
"dependencies": {
    ...
    "workbox-core": "5.0.0",
    "workbox-routing": "5.0.0",
    "workbox-strategies": "5.0.0",
    "workbox-precaching": "5.0.0",
    "workbox-expiration": "5.0.0",
    "workbox-background-sync": "5.0.0",
    "workbox-cacheable-response": "5.0.0",
    "workbox-window": "5.0.0",
    "workbox-navigation-preload": "5.0.0",
    "workbox-broadcast-update": "5.0.0"
},
"devDependencies": {
    ...
    "ts-loader": "6.2.1",
    "typescript": "3.5.3",
    "webpack": "4.41.5",
    "webpack-cli": "3.3.10",
    "workbox-build": "5.0.0"
},
Webpack and workbox-build will only be used at build time, so no need to add them to our main dependencies.
Once added, install these.
Service worker implementation
Now that we have Workbox 5 installed, we can implement the service worker. In my case, the Web is part of a Nrwl NX workspace and I’ve separated the worker from the Angular app as it will be build separately.
Here’s the service-worker.ts file, which is simply put under a src folder like this:
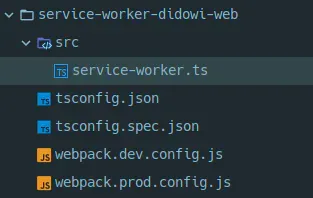
As you can see above, it’s the only file within the src directory. Next to it, there’s:
- a tsconfig.json to configure the TS compiler for building
- a tsconfig.spec.json to configure the TS compiler for testing
- a DEV Webpack config
- a PROD Webpack config
Here’s what the service-worker.ts file looks like:
My goal here is not to explain everything that’s in this file, but just to give you an idea of what it looks like.
Thanks to the Webpack build (which we’ll take a look at next), we can write the file in TS and imports classes, functions and whatnot from Workbox modules.
We had to declare the “self” keyword as it exists in the context of a service worker but is not a standard global outside of there.
Then, we have enabled the debug mode for local development using:
const DEBUG_MODE =
  location.hostname.endsWith('.app.local') || location.hostname === 'localhost';
The rest of the file is really just Workbox 5 code and is not too interesting to detail in this post.
Service worker Webpack build
The Webpack configuration is really basic as we don’t need a lot a lot of configuration in there for the service worker.
Workbox does provide a Webpack plugin, but we actually don’t need it in our scenario.
Here’s what the Webpack DEV config (webpack.dev.config.js) looks like:
If you know Webpack then this will be quite boring; we just use the service-worker.ts file as input (defined through the “entry” property), we transpile the code using the ts-loader module and we ask Webpack to write the generated JS file under the dist/apps/web folder.
The only thing to pay attention to here is the fact that we write the service-worker.js file inside of the folder where the Angular’s build will have put the production build.
The production Webpack config reuses the exact same base config but simply sets the mode to production. This allows Workbox to adapt its output configuration.
Build steps
All of the above is really simple (apart from designing your service worker, but that’s a story for another post).
The “tricky” part really lies in the build steps.
Here’s what needs to happen (preferably in the correct order :p):
- Create the production build of the Angular app
- Transpile the service-worker.ts file to JS using Webpack
- Inject the list of assets in the service-worker.js file
I’ll assume that the first step is already taken care of in your app.
For the second step, we use the Webpack build discussed before.
We’ll discuss the last step in the next section.
Precaching of Angular app assets
For the last build step, we use the injectManifest function provided by the workbox-build module.
So why do we do this? Because we want our service worker to precache all the assets of our Angular app: the images, the JS bundles, everything!
Since the Angular build will already have been generated, our script will be able to list all of those assets and will inject those in the service-worker.js file.
With that done, the service worker will know what it needs to put in cache directly.
Here’s what the script looks like (workbox-build-inject.js):
The process is quite simple; we just pass our Workbox configuration to the injectManifest function, which takes care of identifying the assets and also modifies the service-worker.js file.
Here’s our workbox config file (workbox-config.js):
With this configuration, we define where to look for the assets to cache (through the glob* options) and also where the source and destination service worker files are located.
In our case, we use the same input and output, since we just want to modify the service-worker.js file in place.
Also, notice the “globIgnore” that we have added for the -es5.*.js files. This is used to disable the ES5 bundles generated by Angular. Since those are only required for older browsers, we avoid adding them to the precached resources needlessly.
Another interesting detail is the RegExp provided to the “dontCacheBustURLsMatching” option; we use it to avoid using cache busting for the JS bundles generated by the Angular build.
Build scripts
The final piece of the puzzle is a couple of scripts that instrument the build steps described earlier:
"build:prod:web": "ng build web --prod",
"postbuild:prod:web": "npm run build:pwa:web",
"build:prod:web:local": "ng build web --prod",
"postbuild:prod:web:local": "npm run build:pwa:web:local",
"build:pwa:web": "rimraf ./dist/apps/web/service-worker.js && webpack --config ./service-worker/webpack.prod.config.js --progress --colors && node ./workbox-build-inject.js",
"build:pwa:web:local": "rimraf ./dist/apps/web/service-worker.js &&  webpack --config ./service-worker/webpack.dev.config.js --progress --colors && node ./workbox-build-inject.js",
Let’s discuss each of those one at a time.
The “build:prod:web” script simply executes the production build of the “web” app in our NX workspace (i.e., uses NG CLI to build the production version of the app).
After that, the “dist/apps/web” folder contains the production assets/bundles of our app.
Right after that script, the “postbuild:prod:web” one is executed, which runs “build:pwa:web”.
The “build:pwa:web” script:
- Removes the service-worker.js file in the dist/apps/web folder (just in case)
- Uses production Webpack configuration to generate the service-worker.js file
- Once done, it invokes our “workbox-build-inject.js” script, which identifies all the assets and adds them to service-worker.js for precaching
The other chain of scripts starting from “build:prod:web:local” does almost the same, but with the development version of the Webpack configuration.
Finally, to be able to test the whole setup locally, there are two additional scripts:
"start:web:prod": "npm run build:prod:web && http-server dist/apps/web -d -c-1 -a 0.0.0.0 --proxy http://127.0.0.1:4200? --port 4200",
"start:web:prod:local": "npm run build:prod:web:local && http-server dist/apps/web -d -c-1 -a 0.0.0.0 --proxy http://127.0.0.1:4200? --port 4200",
Those simply generate a production build then serve everything with caching disabled and an automatic redirect towards index.html (mandatory for SPAs with nice URLs).
Note that for the local setup to work, you must access the app over https (or localhost). In my case, I’m using Kubernetes for local development, with a custom DNS name (something like app.local), as I’ve explained in a previous post.
FInally, you can find the gist of the various code samples in this post over here: https://gist.github.com/dsebastien/12c47fdb6517cfdab9473297f4472d22
That’s all for today! ✨
About Sébastien
I'm Sébastien Dubois, and I'm on a mission to help knowledge workers escape information overload. After 20+ years in IT and seeing too many brilliant minds drowning in digital chaos, I've decided to help people build systems that actually work. Through the Knowii Community, my courses, products & services and my Website, I share practical and battle-tested systems. You can follow me on X 🐦 and on BlueSky 🦋.
I am an author, founder, and coach. I write books and articles about Knowledge Work, Personal Knowledge Management, Note-taking, Lifelong Learning, Personal Organization, and Zen Productivity. I also craft lovely digital products.
If you want to follow my work, then become a member and join our community.
Ready to get to the next level?
If you're tired of information overwhelm and ready to build a reliable knowledge system:
- 🎯 Join Knowii and get access to my complete knowledge transformation system
- 📚 Take the Course and Master Knowledge Management
- 🚀 Start with a Rock-solid System: the Obsidian Starter Kit
- 🦉 Get Personal Coaching: Work with me 1-on-1
- 🛒 Check out my other products and services. These will give you a rock-solid starting point for your note-taking and Knowledge Management efforts

